READERS

Friday, December 23, 2011

A Reason To Celebrate

       Okay, I don't know about you but I feel like this year has flown by so fast. I'm already half way into my harder than hard junior year and I'm freaking out a little bit. My teachers, parents, and any other person who asks what grade I am in keeps reminding me what I need to do before next year......ACT score, college, grades, A PLAN of some sort, the list goes on and on. The one thing that gets my mind off of all those things is... you guessed it FOOD!
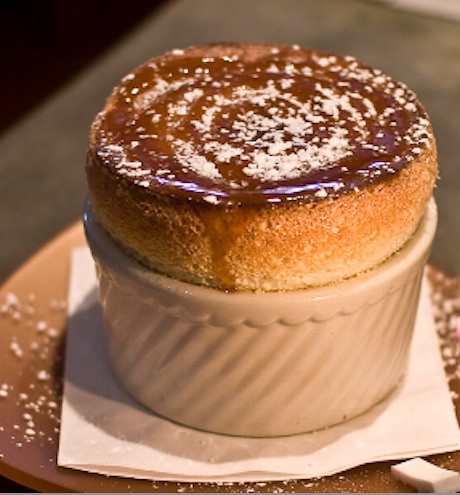
   My Brother Keith's birthday was the 18th and mine was the 20th and since they are so close to Christmas, Keith and I never give each other birthday gifts. This year we decided to make/buy our gifts. Keith LOVES yellow cake, so I decided to bake him a birthday cake from scratch. Keith bought me a cake that I love and dream about all the time, I was very happy!

Yellow Birthday Cake
yum yum
Yield: Two 9-inch round, 2-inch tall cake layers, and, in theory,

4 cups plus 2 tablespoons (480 grams) cake flour (not self-rising)
2 teaspoons (10 grams) baking powder
1 1/2 teaspoons baking soda
1 teaspoon (5 grams) table salt
2 sticks (1 cup, 1/2 pound or 225 grams) unsalted butter, softened
2 cups (400 grams) sugar
2 teaspoons (10 ml) pure vanilla extract
4 large eggs, at room temperature
2 cups buttermilk (475 ml), well-shaken
Preheat oven to 350°F. Butter two 9-inch round cake pans and line with circles of parchment paper, then butter parchment.

Sift together flour, baking powder, baking soda, and salt in a medium bowl. In a large mixing bowl, beat butter and sugar in a large bowl with an electric mixer at medium speed until pale and fluffy, then beat in vanilla. Add eggs 1 at a time, beating well and scraping down the bowl after each addition. At low speed, beat in buttermilk until just combined (mixture will look curdled). Add flour mixture in three batches, mixing until each addition is just Incorporated.
Spread batter evenly in cake pan, then rap pan on counter several times to eliminate air bubbles. (I like to drop mine a few times from two inches up, making a great big noisy fuss.) Bake until golden and a wooden pick inserted in center of cake comes out clean, 35 to 40 minutes. Cool in pan on a rack 10 minutes, then run a knife around edge of pan. Invert onto rack and discard parchment, then cool completely, about 1 hour.
Chocolate Sour Cream Frosting
Yes, it’s true: A chocolate frosting recipe without any butter, whipped eggs and barely a modicum of added sugar. Oh, and you don’t even need an electric mixer to make it. What are you waiting for?
Only cooking note: Be sure that your sour cream is at room temperature before you make the frosting. Makes 5 cups of frosting, or enough to frost and fill a two layer 9-inch cake

15 ounces semisweet or bittersweet chocolate, chopped
1 1/4 teaspoons instant espresso (optional, but can be used to pick up the flavor of average chocolate)
2 1/4 cups sour cream, at room temperature
1/4 to 1/2 cup light corn syrup
3/4 teaspoon vanilla extract
Combine the chocolate and espresso powder, if using, in the top of a double-boiler or in a heatproof bowl over simmering water. Stir until the chocolate is melted. (Alternately, you can melt the chocolate in a microwave for 30 seconds, stirring well, and then heating in 15 second increments, stirring between each, until the chocolate is melted.) Remove from heat and let chocolate cool until tepid.
Whisk together the sour cream, 1/4 cup of the corn syrup and vanilla extract until combined. Add the tepid chocolate slowly and stir quickly until the mixture is uniform. Taste for sweetness, and if needed, add additional corn syrup in one tablespoon increments until desired level of sweetness is achieved.


Let cool in the refrigerator until the frosting is a spreadable consistency. This should not take more than 30 minutes. Should the frosting become too thick or stiff, just leave it out until it softens again.

Sunday, December 11, 2011

ACT Tacos

This morning, of all mornings was the fabulous and terrifying ACT. It was my first time taking it and I was really nervous. My plan was to go in blind and see what I get, then take the class and study. Well lets just say I will be taking it again for sure. I felt good during everything except for the science part. I mean really do I really need to be comparing graphs on rocks and erosion?!?! If you can't tell by my choice of punctuation, I had NO idea what was happening with that whole section of that test. So my Saturday started off not to the best start, but then it got worse because my mom and I decided to go to the mall. It didn't ocure to us that it is about 2 weeks until Christmas! 25 MINUTES TO FIND A PARKING SPOT! So I was having a bad day until my mom said I could make dinner! That always makes my day better. So I decided to make shrimp tacos! I found this recipe online and we just finished eating it. I feel like I just ate a whole....something that makes you feel sick. Anyway, this recipe is really yummy and a little on the spicy side, but you can always tame it down a little bit.

Chipotle Shrimp Tacos!!!

Ingredients:
  • 1 (12 ounce) package bacon, cut into small pieces
  • 1/2 onion, diced
  • 2 pounds large cooked shrimp- peeled deveined, and cut in half
  • 3 chipotle peppers in adobo sauce, minced
  • 12 corn tortillas
  • 1 cup chopped fresh cilantro
  • 1 lime, juiced
  • salt to taste
Directions:
  1. In a large, deep skillet fry the bacon over medium- high heat until evenly brown. Drain the bacon fat. Add the onions to the pan with the bacon and cook 5 minutes or until the onions are translucent. Stir the shrimp and chipotle chiles; cook 4 minutes or until heated through.
  2. Heat tortillas on an ungreased skillet over medium high heat for 10 to 15 seconds. Turn and heat the other side. Fill the heated tortillas with shrimp mixture. Sprinkle with cilantro, lime juice, and salt. You can also add avocado, cheese, sour cream! SUPER YUMMY!!!

Sunday, November 27, 2011

Turkey Hangover...

Happy late Thanksgiving everybody! I hope everyone got to see their loved ones over the break. I don't know about you, but I had WAY too much to eat. I literally felt ill after eating our amazing lunch. My Nana cooked and of course she packet us left overs to take and not only did I gain 5 lbs. just from eating that one day, I gained another 5 from eating two days after Thanksgiving. It will be awsome hitting the gym on Monday...

So last Sunday we had our weekly D.D.D. If you dont know what that is I'll clue you in. Every Sunday my family and my Dad's brother's family eat together and watch Dexter..(Dexter, Dinner, & Drinks..get it) Anyway, we switch off houses every week and last Sunday I was at my house. When D.D.D. is at your house, you make the Dinner and provide Drinks and watch Dexter on your T.V. Hopefully you caught on by now.

So back to my house.... I made bruchetta as an appetizer and I experimented and made a new bread. My mom also made fantastic pasta (I'll share with you later) and we had baked apple crisp for dessert from my Aunt Rene. I have made bruchetta a million times and so I thought I would finally share it.

Bruchetta
  • 6 to 7 plum tomatoes (about 1 1/2 lbs.)
  • 2 cloves garlic, minced
  • 1 Tbs. extra virgin olive oil
  • 1 tsp. balsamic vinegar
  • 6-8 fresh basil leaves, chopped
  • salt and freshly ground black pepper
  • 1 French baguette
  • 1/4 cup olive oil
Get a medium bowl and set a side. Chop the tomatoes, mince the garlic and add the EVOO into the bowl. Then, add balsamic vinegar, chopped basil, and salt and pepper. Put a lid on the bowl or put some covering over it and set in the fridge so the ingredients can mature together. Cut the French baguette into about 1/2 inch peices and set aside. Heat a skillet over medium to high heat. coat both sides of the bread with olive oil and put in the hot pan until each side is golden brown and the set a side. After you are done with the bread, you can top the bread with the tomato mixture and serve. This recipe is awsome and super easy.

Friday, November 4, 2011

Blueberries and Knitting

   A couple weeks ago, while I was on Fall Break, I learned how to knit. I was taught by a fantastic resident at a retirement community, Jonni  and she was a great teacher. She was taught by the Red Cross during WWII and she knitted vests and all kinds of things for the soldiers at war. I love hearing all of her stories and her many adventures she has had. The ladies at this retirement community knit every Friday at 1:30. I could go during Fall Break because I was off school and I could go today because I was off school for conferences. Anyway I have learned to knit and I love it! And to all those people who laughed at me for learning how to knit, looks like you don't get a Christmas present. You shouldn't have laughed....... I'm not bitter about people laughing at me or anything... 

   So I was going to Sit'n Knit today and I thought I would use my other fabulous, not laughable talent to bake something yummy for the ladies. I found this amazing blueberry lemon bread recipe. It sounded so yummy so like I always do, I made it. It ended up being a great hit and the ladies loved it. I know what your thinking, wow she can cook and knit, she must be super woman! No, almost though.....I'm getting there. Since I'm almost super woman I thought I would share the secret to my success....THE RECIPE!

Sit'n Knit Yummies
Also known as Lemon Blueberry Yogurt Loaf

For the loaf you will need:
  • 1 1/2 cups + 1 tablespoon all-purpose flour
  • 2 teaspoons baking powder
  • 1/2 teaspoon kosher salt
  • 1 cup plain Greek yogurt
  • 1 cup sugar
  • 3 large eggs
  • 2 teaspoons grated lemon zest (about 2 lemons worth)
  • 1/2 teaspoon pure vanilla extract
  • 1/2 cup vegetable oil
  • 1 1/2 cups blueberries, fresh or frozen, thawed and rinsed
For the lemon Syrup:
  • 1/3 cup freshly squeezed lemon juice
  • 1/3 cup sugar
For the lemon glaze:
  • 1 cup powdered sugar
  • 2 to 3 tablespoons fresh lemon juice
Directions:
  1. Preheat oven to 350 F. Grease bottom and sides of one 9 x 5-inch loaf pan.(I put parchment paper on the bottom of loaf pan because it tends to stick! Hate it when that happens, don't you?)
  2. Sift,sift,sift,sift,sift,sift.
  3. In a medium bowl, sift together flour, baking powder and salt. Set aside.
  4. In a large bowl, whisk together the yogurt, sugar, eggs, lemon zest, vanilla and oil. Slowly whisk together the dry ingredients into the wet ingredients. In a separate bowl, mix blueberries with remaining tablespoon of flour, and fold them very gently into the batter.
  5. FOLD the blueberries into the batter.
  6. Pour the batter into the greased loaf pan and bake for 50-55 minutes or until you insert a tooth pick and it comes out clean. Then take it out of the oven and let cool for at least 10 minutes before you take it out of the pan. While the bread is cooling make the syrup by mixing the lemon juice and sugar together and putting it on the stove until the sugar is dissolved.
  7. When the syrup is done, poke little holes in the top of the loaf with a tooth pick. Brush the syrup onto the loaf and all around the sides. Do that twice. You will have plenty of the syrup left over. Let the loaf cool completely.
  8. Loaf with the syrup!
  9. When the loaf has cooled completely, make the glaze. Mix the powdered sugar and lemon juice together until it is stiff but enough for it to be poured over the loaf. When poured, let it do it's thing for 15 minutes and you can serve it!
So I have shared with you a super woman recipe and I trust you to only share it with the people who can handle the greatness of this recipe.

The dog wags his tail, not for you, but for your bread.
Portuguese Proverb

Everyone is kneaded out of the same dough but not baked in the same oven.
Yiddish Proverb

Saturday, October 29, 2011

Family Matters

UPDATE! A lot has been going on in my world lately and I thought I would update you on what has happened!

This past weekend I met the most awesome man on the Food Network! I'm going to let you guess.............

I'll give you a hint...
Good Eats
Iron Chef

Any guesses? OK I'll just tell you, Alton Brown!!! Oh my goodness I was super excited to meet him! He came to Oklahoma for his 3rd cookbook signing tour. When my mom and I found out he was coming, we were so excited!!! If you are unfortunate and don't have good taste in food network shows and don't know who Alton Brown is, look him up! He is funny, smart, and his show is excellent! I kind of have a secret crush on him! His recipes are awesome and you need to try them!

OK, so the other thing I need to tell you about is that my Uncle Mark and his family came over to watch Dexter and we ate and had a good time. We ate an amazing dinner that almost everyone contributed to. My wonderful dad grilled steaks, my beautiful mother baked potatoes, my Uncle Mark created a wonderful salad, and my Aunt Rene made a home-made apple pie! By the end of the night I thought my stomach was going to burst because I was so full, but it was worth it!

My Uncle Mark's salad consisted of: grilled romaine lettuce, walnuts, feta cheese, purple grapes and a fantastic dressing. This salad was amazing and very artistic looking. My Aunt Rene's pie was a fabulous Paula Deen recipe and it was the best apple pie I had ever eaten. It was so yummy and what made it even better was that my favorite aunt made it from scratch and it had apple sauce in it! Sounds weird, but it made the pie even better.

I love my Uncle Mark, Aunt Rene, my cousins Megan, MariBeth, and Seth so much! They are awesome and I'm so blessed to have such great family and I can count on them for anything! Have a great Halloween! Be thankful for your family!

Thursday, October 20, 2011

Pepper Jelly on a Lazy Day

      This past weekend, my three best girlfriends and I went to a Taylor Swift concert! It was so fun and I wish I could have a Taylor Swift concert every night with my best friends! So the concert was on a Saturday night and I didn't get home and in bed until after midnight! I was exhausted! So I didn't go to church the next morning and I felt really guilty, but I know He still loves me even though I skipped church!ha
         So on my lazy Sunday my family and I made Pepper Jelly!!!! We have the best time making it and we are eating it like crazy!! So I took some pics for you guys to show how easy it is and how you can do it too!

         AMAZING Pepper Jelly
        recipe from Putting Up

Canning Notes:
  • This recipe can be doubled but not halved.
  • Makes 7 plus pints of jelly
  • This is a hot pack, sugar saturated recipe
Ingredients:
1 1/2 cups small dice green bell pepper (seeded)
1 1/2 cups small dice red bell pepper (seeded)
1 1/2 cups white vinegar (5% acidity)
6 1/2 cups sugar
1/2 tablespoon butter
2 tablespoon red pepper flakes
1 pack liquid pectin (Certo)

Bring all ingredients except pectin to a rolling boil in a pot. Add pectin return to a boil. Time for 1 1/2 minutes and begin checking for jelling.  Take pot of burner and start putting the ingredients equally into 6 pint jars. DO NOT GET THE JELLY ON THE SIDE OF THE JAR OR ON THE RIM. After you have distributed the jelly equally into the jars, put the lid on tight and turn over for 2 minutes and then turn back over for 2 minutes and keep repeating until it is firm enough for you!!!


Enjoy your jelly on crackers with cream cheese! Happy Canning!!!

Saturday, October 8, 2011

hum...hum...HUMMUS!!!

I don't know about you, but I LOVE hummus! Hummus is my go-to snack after school. I normally just buy the organic hummus from the store, already mad. BUT today I had the brilliant idea to make it myself! I don't know if you know this about me but last spring break I was was "vegan". I put vegan in quotations because I didn't stick with it:( My whole family is big on hunting, I mean I have dead deer hanging on my living room walls. I couldn't do, I felt like the deer were really staring at me and my chickens wanted to peck my eyes out for not eating their eggs. Let's just say it was difficult.

Back to the hummus! So the whole story about me being a vegan had a point, I bought a vegan cook book. I never use it but I knew it had great hummus recipes, so I dug it out of my growing shelf of cookbooks. I looked through the chapter about hummus and I found one that sounded yummy. Chipotle Lime Two-Bean Hummus! This recipe seriously took me maybe 5 minutes to make! Super easy!

Chipotle Lime Two-Bean Hummus
Eat Drink and be Vegan-Dreena Burton
1 cup cooked kidney beans
1 cup cooked chickpeas (garbanzo beans)
4-4 1/2 tbs. freshly squeezed lime juice
1 medium garlic clove
2- 2 1/2 tbs. extra virgin olive oil
1/2 tsp sea salt
1 1/2 tsp. Tabasco sauce
1 tsp. agave nectar
1-2 tbs. water (depends on how thick or creamy you want it)
1 tsp. lime zest,grated
1/4 cup fresh cilantro leaves

In a food processor, combine all ingredients except water, lime zest, and cilantro. Puree until smooth, gradually adding water as desired to thin dip and scraping down sides of bowl as needed. Add lime zest and cilantro and puree briefly to incorporate cilantro.

Refrigerate and enjoy! You can eat with pita, crackers, anything. I'm spreading the love of hummus to you, so try this recipe!!!

Wednesday, October 5, 2011

Things I love about my brother

My brother is 18 years old. He is 2 years and 2 days older than me. We weren't that close when we were in  middle school, but since we have out grown all of our "your touching me" or "he's looking at me" phase, we are the best of friends. I'm not going to lie and say "Oh we are the perfect siblings and we never fight" we fight sometimes, but not as bad as it was when we were younger. We have become closer because we have both matured and realized that we are all we have. That's my only brother and that's that.

Some things I love about him are, he is very kind and helpful(when he wants to be). He does a lot for me and he appreciates me. He is the best brother. I mean there are some down sides for having a big brother. He is very protective, mean at sometimes, and he thinks he has a say over what I do. But don't get me wrong, he is great.

About a month ago my brothers girlfriend and I made dinner for Keith. My brothers girl friend emitted to being....... lets say "helpless" in the kitchen, so I promised her we could make dinner for Keith and I would teach her some things. I got out my new cookbook and we found a recipe that Keith would LOVE. Beef Volcano! Sounds fun huh?!?! Well a beef volcano is a huge thing of mashed potatoes covered in beef that is cooked in wine, bacon, little onions and other yummy ingredients. One thing about my brother that I don't like is his metabolism. He can eat WHATEVER he wants and he won't gain a pound. It's depressing:(


Beef Volcano
Rise to the Occasion
Yields 4 servings

1 cup water
10 ounces white pearl onions,peeled
salt & pepper to taste
1 tbs. sugar,divided
4 tbs.+ 1 tsp. butter,divided
1 pound beef tenderloin
2 tbs. olive oil
2 tbs. white flour
2 cups red wine (Merlot)
2 cups veal stock
4 ounces bacon, crisped and diced
8 ounces button mushrooms, quartered and sauteed

To caramelize onions, boil water in a small pot. Add onions, salt, pepper, 2 teaspoons sugar, and 1 teaspoon butter. Simmer over medium heat until the onions have absorbed all the water, about 15 minutes. Set aside.

Cut the tenderloin in large rectangles measuring 1 1/2" x 1". Season with salt and pepper. In a large pot over medium heat, sear beef in olive oil for 2-3 minutes. Remove beef from pot and set aside.

In the same pot make a roux be combining 4 tablespoons butter with flour. Cook over medium heat, stirring, for 2 minutes.

Add the wine, veal stock and 1 teaspoon sugar, stirring often.

Simmer gently over medium heat, uncovered, for 20-22 minutes.

Add the onions, beef, bacon, and mushrooms. Serve hot over mashed potatoes.


This recipe sounds involved and super long, but its not. Give it a chance and try it. You will not be disappointed!

Tuesday, October 4, 2011

The perfect sugar cookie

       This is weird. I haven't blogged since August. I have missed this. Last year as I was signing up for my junior year classes, a couple of people told me that junior year is easy! I was excited, but my excitement soon came to a holt after the first week of school. This year I am taking AP language, AP US history, Physics, & Algebra II. During the first week of school I had a total break down after school one day. It was horrible, and I cried and said I didn't want to go to school like I was four years old or something. But finally after the SIXTH week of school, I am finally getting the hang of college classes and that I actually have to plan ahead for the week  to come.  Lets just say lesson learned.
      Since I haven't blogged in so long, I was trying to think about what to blog about. Since fall is around the corner and Halloween is fast approaching, I thought of sugar cookies. For some reason fall makes me want to make sugar cookies. It's something about making a cookie and then decorating them in the most artistic way. Sunday's are my cookie day. Drinking my pumpkin spiced coffee and decorating cookies in my comfy clothes. Sound like a good day doesn't it.
     Now to the cookies! I feel like my Nana has perfected the art of making sugar cookies. The recipe is very simple, but you will never use another recipe after this one.

SUGAR COOKIES
1 CUP  soft margarine
1 1/2 CUPS powdered sugar
1 egg
1 tsp. vanilla
2 1/2 cups flour
1 tsp. baking soda
1 tsp. cream of tarter
1/4 tsp. salt

    Cream together margarine, powdered sugar, egg, and vanilla. While that is being creamed together, combine dry ingredients: flour, baking soda, cream of tarter, salt. After the wet ingredients have been creamed, pour the combined dry ingredients in the mixer, a little at a time, until it is all combined.
    Chill until hard. Then roll out about 1 to 1/2 inch thickness. Cut with cookie cutters and place on a greased baking sheet. Bake on 375-400 oven for 8 minutes. Watch the cookies as they bake, don't let them get too brown! Just a little golden around the edges. Let cool and decorate!!!

Wednesday, August 17, 2011

Pie Diner & More to Come!

Last night I was laying in bed thinking about how summer is almost over and how much time I had before school starts. To stop all of my crazy thinking, I turned on the T.V. and of course nothing is on at midnight. So I go to my DVR and I see something that I have recorded and forgot to watch it. The show that I recorded was Unique Sweets on the cooking channel. I am in love with this show! If you haven't seen it, I highly recommend watching it. The reason I love it so much is because I feel like my true calling is baking and the whole show is about baking different, fun, and crazy things. When I bake I feel relaxed and feel all warm inside. The best for me is baking for someone else. I love it, it makes me feel like I have really brightened up someones day!

So last night on Unique Sweets they were talking about pies! They went to all these fun pie places all over the country. It was so cool! While I was watching the show I got this urge to make a pie. I don't know if it was the weird herbal tea I was drinking or the anxiety for going back to school that was making all these thoughts go into my head. Of course I wasn't going to make a pie at midnight and I sure wasn't going to go get one, so I had to wait.  This morning my mom and I were talking and I brought up this idea to open up a pie shop! My mom thought it was a great idea and we kept talking about these ideas and all kinds of stuff. Of course in my head it was going to work out perfectly because I have all the money in the world. I am lying, I don't have all this money lying around to open up a pie shop! I mean its a great idea because there really isn't a place in Edmond where you can buy just pies! And my mom was thinking for it to be like a 50s Diner! Before I start rambling about how cute it will be and all the ideas we came up with, I will stop myself. OK so we can't start off in a building so I had the idea to start at the farmers market. It will be a great start to see if people will really buy them and hopefully come back the next week for more! If any of you steal my idea, I will find you and burn down your pie shop and then thank you for reading my blog! So anyway the farmers market is almost over, so that gives me and my mom plenty of time to master that art of pie making. Wish us luck! So with all of this trying and failing, I will be posting some of the pie recipes on here. Of course not all of them because I love you guys, but not enough for you guys to steal all of my pie recipes. So don't give up hope of me not posting anymore recipes. Trust me keep up with my blog or you will miss out on some great recipes! High Pie!

Thursday, August 11, 2011

Mother Daughter Adventure


This past weekend my mom and I took a girls trip to Dallas Texas. I had all this babysitting money that I had been saving and I wanted to buy some new clothes for school. We love going to Dallas because it feels like we are getting away even though it's only 3 hours away from home. It's great to go because it gives time for me and my mom to connect and talk. We have a ton of great memories when we come home and we have the best time. We normally go to north park mall because it has higher end stores and I think it is a better mall. This time I spent almost all my money in Anthropology! If any of you have been there or got to experience its awesomeness you know what I'm talking about.

taste of the inside
Anyway, while we are there we try to eat at places that we don't have in Edmond or that are unique little places. This time we went to this awesome place that we found online. It is called Rise No. 1 and it is the best place in the world! It has the best environment and unique things in this place it is un real. They are known for their AMAZING souffles. They have other things but you want their souffles! Unfortunately we forgot our camera and I was going to bring it so I could take pictures of this crazy food to show you guys but I found some pictures online to give you a little sneak peek.
I'm going to give you a play by play on our great meal.

First when you step in there are a ton of people and we went for dinner so the lights were dimmed. The tables all over to  just fit all these people. You can eat outside or inside, we choose not to sweat in the 108* Texas heat. But I'm sure its fabulous in the fall and spring. So their is a chandelier made out of wine glasses and trees in the restaurant. I could go on and on about the decor but I'm going to get to the food part. So we sit down and look at the menu, and our waitress comes over and we ask her what to get. She recommended to get an appetizer because the souffles take about 20 min. to make so we can order our souffle and appetizer that the same time so we wont be waiting forever. She said she would get the marshmallow soup for an appetizer. My mom and I looked at each other and said OK we'll give it a shot! And at the same time we ordered our souffle, I got herb and spicy sausage and my mom got sun dried tomato and pesto.  We got the marshmallow soup and it turned out to be tomato and basil soup with 3 goat cheese marshmallows! It was so goood!!!!! We practically licked to bowl clean! Our souffles were wonderful as well!! So yummy and so rich with flavor! For dessert we got a AMAZING bread pudding souffle!!!! It was heaven in a bowl!!! They brought it out to you and they poke a hole in the top and our this yummy cream inside and it puffs up even more!!! Its crazy! I was so crazy about this place that I bought their cookbook! I'm going to try to master the art of souffles! Wish me luck! :) So if you are ever in Dallas Texas please, I beg you, GO to Rise No. 1!!!!! You can also go online and look at their menu and pictures of all the amazing food!!!


marshmallow soup!

the bread pudding souffle!!!

Our souffles looked like this!

Bought this cookbook!!!


Saturday, July 30, 2011

Cheese and Honey

So about a week ago my dad donated one of his kidneys to a man at our church. That's one of the many things I love about my dad. If he has anything to give, he will give until he can't give anymore. Literally he can't donate anymore kidneys, so don't even ask. Anyway, at our church if someone has surgery, has a baby, or someone passes away we bring food to them. I don't know if any other church does that, but mine does. It is a great help because the last thing you want to be thinking about is, what am I going to cook. The people who have brought us food have been so generous and loving. BUT I feel like I have gained 50 lbs! The food is wonderful comfort food. I'm talking banana bread, BBQ, lasagna, pasta, cake, pies. You name it, we have been eating it in the last week. We have so much food in our fridge, freezer and pantry than anyone should ever have. So my mom told her church class thanks and that's enough.

So last night our long time family friends the Pipkins came out to our house last night. They said they were going to bring dinner and we didn't have to worry about it. We had no idea what they were going to bring so I was trying to think of an appetizer. I got online and went to my favorite website of course notwithoutsalt and got a grilled cheese with thyme and honey. I thought this would be great and easy.

Grilled Brie Cheese with Thyme and Honey

1 Brie cheese
a couple springs of thyme
1/4 cup honey

On a inside grill, outside grill or panini maker place the cheese on it when it gets really hot. Keep an eye on it to make sure it doesn't get burned. While that is grilling put the honey and thyme in a skillet on medium just to infuse the thyme with the honey. Once you start to see the honey bubbling, its done. Once the cheese has grill marks on both sides and it is soft and yummy, take it off the grill. Place the cheese on a platter and put the honey on top. Serve it with a baguette.

This makes a great appetizer and it was super easy. You can really use any cheese you like, but the Brie has that hard outside white stuff so it holds up better. Try it out and tell me what you think! Happy cheese grilling:)

Thursday, July 28, 2011

Cupcakes!

In the summer time I babysit about three times a week. If any of you babysit, you know that the more you do, the quicker the time passes. I figured that out probably my 2nd year of babysitting in the summer. I try to do everything from library visits or going to get cupcakes! I was babysitting the other day and I thought it would be a good idea to go get cupcakes. I don't know if cupcakes are a "big thing" where you are from, but in Oklahoma they are everywhere! The Sara Sara cupcake people built a new cupcake place in Edmond, they had one in Oklahoma City but it was too far out there. So we went to the new one in Edmond. The kids were super excited and may I remind you that the kids are 8, 5, & 3. So we get three cupcakes for us all to share. The cupcakes are ridiculously expensive, but I mean why not. I thought it was going to be a one time thing, boy was I wrong. While we were still at the Sara Sara cupcakes, the kids were all ready saying when we were going to come back. I hope the know that I just don't have all the money in the world to spend on cupcakes.
I had an idea to just buy a cake mix and bake them myself and then take them over to decorate! So that's what I did last night. I baked 24 spice cupcakes last night and took them over to their house today with a tub of icing, sprinkles, and food coloring! We had so much fun and it was much cheaper! I was so proud of myself for saving money, but in the end having more fun!
I thought I would share with you a cupcake recipe that I love!

Black and White Cupcakes!
makes about 18-20 cupcakes!
 INGREDIENTS
1 (8 ounce) package of cream cheese, softened
1 large egg, at room temperature
1 1/3 cup sugar, divided
1 cup semisweet miniature chocolate chips
1 1/2 cups all-purpose flour
1/4 cup unsweetened cocoa powder
1 teaspoon baking soda
1/2 teaspoon salt
1 cup warm water
1/3 cup vegetable oil
1 tablespoon apple cider vinegar
1 teaspoon vanilla extract

DIRECTIONS
Preheat oven to 350*

In a medium bowl,beat the cream cheese, egg, and 1/3 cup of sugar with a machine mixer on medium speed until the mixture is creamy and fluffy. Stir in chocolate chips and set aside.

In a large bowl thoroughly combine the flour, the remaining cup of sugar, cocoa powder, baking soda, and salt. Make a well in the middle of the dry ingredients and pour the water, vegetable oil, vinegar, and vanilla into it. Mix until just combined.

Fill each cupcake liner one-third with cocoa mixture and top it with the cream cheese mixture until the paper is about two-thirds full. Repeat for every one. Bake for about 20-25 minutes or until the tops spring back when touched. I like them a little under done from the oven because they cook a little more in the pan.  Let the cupcakes cool in the pan for 10 minutes, but then take them out to cool completely on a wire rack. Once cooled top with sour cream frosting! I prefer eating them warm with milk:)
If you want to eat one the next day pop it in the microwave for 10 seconds and enjoy with a big glass of milk!


Our beautiful creations


Two of my favorite cupcake books!


Little helper


Monday, July 25, 2011

Lemon Curd

I really love lemon and I mean I love it! One of my favorite things to do is go to this restaurant/bakery with my youth minister Megan and get a lemon square! We both love them and they are fantastic. So if you are ever in Edmond Oklahoma, go to Mclaren's Pantry and order a lemon square. They are perfectly put together and topped with a thick layer of powdered sugar! My stomach is growling just think about it.
The other day I was looking through some recipes and came across a lemon curd recipe. I quickly looked at the recipe and began taking a mental note of what was needed for the recipe. I was so happy because I had everything for the recipe and didn't have to take a trip to the store.

Lemon Curd
Put on bread or a blueberry scone
1/2 cup fresh lemon juice
1/3 cup Cane sugar
2 eggs
2 egg yolks
6 tbsp. butter
pinch of salt

Place a mesh strainer over a bowl and set aside.

In a medium sauce pan put the lemon juice, sugar, eggs, eggs yolks, & salt and whisk together. After you whisk those together put the butter in the mixture and put over low to medium heat. Stir until the butter has melted.

After the butter has melted turn the heat up just a tiny tiny bit and whisk constantly. You will whisk this until the mixture is thick almost jelly like. You can tell when its done when you lift the whisk out of the pan and its thick and sticks to the whisk and it holds its shape. It took me a little over 10 min. Be patient, it will happen. Don't increase the heat, that will not help you. Just keep the faith that it will happen.


Immediately after it is done run it through the strainer that was sitting aside. Some of it you will have to push through. Keep it in the fridge. Enjoy!

Sunday, July 24, 2011

Asparagus Tart!

In my family food is everything. We love to cook things together and then talk about how wonderful it tastes. Everyday someone in my family will ask "What are we having for dinner tonight?" We like to try new recipes, but we don't do anything crazy. We stick to the ingredients that are familiar to us. For example, we would never try a recipe with squid because its not like we eat it all the time. If we grew up eating squid then maybe we would cook with it more often. But my family is also not boring, don't get me wrong. Half the things we normally cook with, people are scared to even try. For example, chicken livers, deer meat, and on occasion with my Uncle Mark beef tongue. But normally we stick to normal ingredients and try to mix it up a little bit. 

My family loves asparagus! We eat it every way, boiled, grilled,or steamed. Its great in the spring and summer, that's when we have it the most. The other day I was at the farmers market in Edmond and I found a fabulous bunch of asparagus. You could tell they were home-grown and yummy! So of course I bought two because one is never enough. I brought them home and showed them off to my mom. I was so excited about the asparagus, I thought that I needed to find a new and fun recipe to try. I went online to my favorite website and found a recipe for an asparagus tart from Ashley Rodriguez(my favorite). It was a very simple recipe that was very Delicious! I thought that I would have to share it with all those asparagus lovers out there.

Asparagus Tart 
Eat with a dressed salad and it makes a lovely summer lunch.
serves 6-8

      1 bunch of asparagus
      1 tablespoon olive oil
      1 package of store bought puff pastry sheets(you can make your own but I was on a time crunch)
      1/4 cup Mascarpone(yum)
      1/4 cup heavy cream
      1 large clove of garlic, minced
      1/2 cup walnuts, toasted and chopped
      Parmesan
      pinch on pepper flakes
      salt and pepper

preheat your oven to 420. Line baking sheet with parchment

Roll the puff out on the baking sheet into a rectangle.  Carefully put into the fridge while you prepare the other ingredients.

In a small bowl combine the Marscarpone, cream, garlic, pepper flakes, and a hefty pinch of salt and pepper.

Remove the woody part of the asparagus ends and then toss with olive oil.

Remove the puff from the fridge and top with the Mascarpone mixture leaving a 1" border around the edges. On top of the Mascarpone lay the asparagus down, single file, one right next to the other. Sprinkle with fine sea salt and place in the oven. After the first 20 minutes of baking reduce the heat to 350 and continue to bake for another 20-30 minutes, until cooked through.


Remove from the oven and let cool slightly. Before you devour it, top with the toasted walnuts and shaved Parmesan. Serve warm or at room temperature.
 

Thursday, July 14, 2011

NEW COOKBOOK!

I told you guys earlier that I got a new cookbook! I was super excited to make something out of it! The cookbook is called Heart of the Artichoke.  It is fantastic and I would recommend it to anyone who loves cooking! The author, David Tanis, is brilliant and funny. It's a great cookbook to just look at and read. David organized the book by seasons, so you can flip to the season you are in at the moment and cook what would taste the most fresh and yummy. Probably tons of cookbooks are like that, but the ones I have are organized into categories such as main course, desserts, etc. Anyway, I was super excited when my mom came to me and asked what we should have for dinner. I ran and got my new cookbook and flipped to the summer section and skimmed through to see what our choices were. I chose Flat-Roasted Chicken with Rosemary, Salt-Roasted New Potatoes, and Green Bean Salad with Pickled Shallots, and for dessert Golden Crunch Cake. The whole meal was so yummy, fresh and light. It truly was a summer meal.

                          Flat-Roasted Chicken with Rosemary
                          1 organic chicken, about 3 pounds              2 teaspoons red pepper flakes
                          Salt and Pepper                                           Olive oil
                          1/4 cup rosemary leaves                             1 Lemon, sliced
                          6 large garlic cloves, sliced
Wash the bird and pat dry. Remove the backbone with a sharp knife.( I know its a pain, but just remove it fast like a band aide) Push down on the breast bone to open the bird like a book.
Put the chicken in a large roasting pan and season generously on both sides of the bird with salt and pepper. Sprinkle with the rosemary, garlic, and red pepper flakes. Drizzle with Olive oil and with your hands gently smear the rub onto the chicken.
Make sure all of the bird is seasoned to your liking and then slice the lemon and place them on the bird in different places. Secure the lemon with wooden skewers and place in the refrigerator for two hours. Decide on what time you are going to eat this lovely bird and take it out an hour before you are going to roast it. Preheat the oven to 400 and roast for about an hour. When you take it out of the oven, let the bird rest for about 15 minutes and cover it with foil.

When I took the chicken out of the oven, I thought it looked so cute! And then I look out my kitchen window and I see our chickens..... I will never eat my chickens. The ones from the store, no problem, but when it comes down to a pet or an animal you have named, MAJOR issues! I hope you enjoy this recipe. And for all those Harry Potter fans out there... you know who you are. Well you are probably at the premier right now, waiting in a ridiculous long line. Anyway, I'm a little excited because I got THE Harry Potter cookbook and I will share some recipes with you soon! 


Sunday, July 10, 2011

Tequila,Peaches, and Breakdowns

OK so I have to admit something. Friday I decided to make an amazing tequila peach pie! I was making it for our family fish fry. My dad's brother was coming out with his family and I was going to impress them with how great a cook I am. Well I really don't know if it's amazing because I never got to taste it. But really peaches soaked in tequila, lime juice, sugar and other yummy stuff all in a pie not amazing, ya right! If it doesn't sound amazing to you, then you are missing out. So back to my story. I made this pie from scratch, all the way down to the crust. And I hate making pie crust, hate it! Anyway so I make the pie crust, let that set in the fridge for an hour, and then put the yummy peach stuff together. The whole pie took me about 1 1/2 to prep. I'm slow, but some of the time was needed. So I had the pie put together and I had to put it in the freezer for 15 minutes before baking it. I go to my freezer, which is full of frozen fish just to let you know, put the pie in the freezer. I have to remind you that the pie is on a medium to large baking sheet. It wasn't quite going in there right so I open the door all the way to adjust it and the baking sheet slips out and the amazing, beautiful pie goes all over the floor! I look at it and immediately start crying, and I mean crying. So I run past my brother, who is staring at me and the awful spilled pie. From my bedroom I hear my parents walk through the front door, then I hear my brother say "Get ready, she dropped her pie!"
Then to make matters worse, I walk into my kitchen after I stopped crying and my dad says "Well, can you just make another one?" I look at him, and then just start throwing all of my dirty dishes from the pie into the sink. So then my mom starts yelling at me to stop throwing stuff around and then I start crying again, AGAIN! I really wanted that pie!
I am very sorry that I don't get to tell you how fabulous the pie was, but when I get the courage to make another one I will for sure tell you how amazing the pie was.
To make myself feel better, I went to Barnes and Noble (favorite place to go when I'm upset) the next day and got myself a too expensive, fabulous cookbook!  It is called Heart of the Artichoke   by David Tanis. It is a lovely cookbook that is worth getting. If you love to cook or you're the type of person who gets cookbooks just because they look pretty in your kitchen get Heart of the Artichoke. Seriously.

Tuesday, July 5, 2011

The Love of My Life

OK, OK I know what you're thinking "The love of her life!!! WHAT!" No, No I have not found the love of my life yet. I have found PEANUT BUTTER!!! It's not THE love of my life, but its pretty far up there on my list of favorite foods! I feel bad for the people who are deathly allergic to peanuts.:( I'm very sorry but if you aren't, I'm about to share a recipe with you that is heaven in a jar!
Yesterday as I got home from the lake I had an idea. I was watching my dad make a peanut butter and jelly sandwich and it clicked in my brain as I was licking my dad's used peanut butter knife. And I know what you're thinking, licking a knife is very unlady like. But I was in the comfort of my own home and I was exhausted and sunburned from the lake and I felt like I needed a little treat. Anyway, I'm a crunchy fan not creamy. My dad is also a crunchy fan and all we had in the house was creamy. I mean I'll eat creamy, but crunchy is still my favorite. So I thought I will make my very own crunchy peanut putter! And then I thought some more, I will make Honey Roasted Crunchy Peanut Butter! I was very excited, if you couldn't tell.

Molly's very own Honey Roasted Crunchy Peanut Butter
Original recipe from Ashley Rodriguez- notwithoutsalt
                              12 ounces roasted, Spanish peanuts
                              1/2-1 teaspoon kosher salt
                              1 tablespoon honey
                              1/4 cup canola oil
                               a tiny bit of pure vanilla

First put the peanuts in the oven on a baking sheet. Put the oven on about 200 and watch very close so you get the right roast you want. After you get them out of the oven, let them cool and take off all the red skin on the peanuts.
Place the peanuts, honey, salt, and vanilla in the food processor and pulse together. After a little bit of pulsing put the canola oil in the food processor while it's going. Then you can determine how creamy or CRUNCHY you want it. I think you know by now I like the extra crunch in the peanut butter. After you blend it together take the butter out of the processor and put it in a jar. Store in the refrigerator up to two months. Trust me, it will not last that long if you are a peanut butter lover like me.

I used the Spanish peanuts because they are good and they have great flavor after roasting in the oven. I like to keep them in there for a while so they get that yummy rich flavor, but not burned of course. You can also just buy peanuts all ready roasted and salted, just don't roast them and don't salt them. Just skip to the food processor part. I hope all you peanut butter fans enjoy this fabulous piece of heaven!


Monday, July 4, 2011

Tips and Tricks to Camping

Happy 4th of July everyone! I hope everyone is safe and doesn't get burned by any fireworks! I spent my 4th at the lake with my family! We go every summer and it is a blast. We have tube wars, fish, and wake board. If you didn't know this, Oklahoma weather in July is very HOT!!!! We had fun, but we were a little hot! If you have ever been to the lake you may know that you meet some interesting people there. For instance on one of the days that we were there, we saw a boat that said "Upper Class White Trash". And yes that is the truth. We didn't tent camp of course but I still call it camping.
My dad, Uncle Mark, my brother, and my cousin fish while we are there as well. Normally they catch a ton of fish, but this time they only caught a couple. One of the few they caught weighed about 60lbs. YES 60LBS.!! Crazy right?!

My cousin and me with the Huge fish!
 So we had a great time. I'm sunburned and exhausted! A fish fry is coming up soon, so I'll keep you posted:) Before I go I would like to give you some cooking tips when it comes to camping.
1. If you are packing eggs to cook with in the morning, crack the all into a empty Gatorade container and put them in an ice chest. They don't get cracked and you have eggs to eat in the morning. This brilliant  idea is from my favorite Uncle Mark.
2. When you are cleaning fish, DO NOT put the fish in the same ice chest as the drinks. Even if the are in baggies, the smell still gets on the drinks and so bring an extra ice chest, if you are fishing.

Like I said, just a couple of hints for you the next time you go camping. I will share this AMAZING  Brown Sugar Pound Cake recipe for you later. Its a new twist on strawberry short cake! I took it with me camping and it was a hit! So stay tuned:)

Saturday, June 25, 2011

I Can't Believe it's Butter!


I had the brilliant idea, I wanted to make butter! I did the research for it and all you need is cream! You get a jar and fill it a little under half way, put a little salt in it and then close it up REALLY tight! Then you just start shaking it, and shaking it, and shaking it. You have to shake it really hard! Soon it will become looking like whipped cream, when it gets to that stage its almost there! Just keep shaking it! It gets a little harder but just keep going! Soon you will see a ball of something and some liquid on the bottom. So when you see that, open the jar and pour out the liquid only! The liquid you just poured out was buttermilk, so you have successfully made buttermilk as well. OK so after you poured out the liquid close it up and shake a little more, and then more the remaining liquid out. After that pour a little cold water on the ball of butter in the jar and shake a little, then pour that liquid out. You now have butter!!!!

The cream in the jar!
The butter you just made may not look like the butter you get from the store. It's probably not as yellow because the factories put yellow dye into the butter that they make. So do not be scared. Put it in the fridge over night. When you want to use the butter, just take it out a couple hours before because it is real butter and its really hard! I hope you love your butter. And after you make it you will be so proud of yourself!
Buttermilk!
BUTTER!!!