READERS

Monday, June 3, 2013

Espresso Banana Bread

Its official summer! thank goodness! I have been waiting for summer I feel like since summer ended last year. around here in Oklahoma there have been some destruction. for instance; tornados, thunder storms, hail, rain that seems like it will never stop. So it doesn't really "feel" like summer even though its already June and Fourth of July things are already out at Wal-Mart. Wal-Mart is always in a hurry aren't they, Like right when the Fourth of July passes, they put out school supplies! I want to scream when I see them because its just a reminder that my summer is half way over.


So on this dreary/summer Oklahoma day all I feel like doing is making banana bread and watching Army Wives on Netflix (possibly the most addicting show and the bad part, there are 6 seasons... I'm already on season 4 and its only been a week. SCARY)

This recipe I found while scanning through my saved recipes. I got it out of a magazine, not sure which one because I ripped it out, but either way its was very good. Something different for a change. I always make my banana bread recipe which is my ALL time favorite, but I decided to mix it up a little bit. Hope you like it!

Espresso Banana Bread
found in my pile of recipes
makes 1 loaf

  • 1 1/2 cups mashed bananas (about 4)
  • 1/4 cup sugar
  • 1/4 cup packed brown sugar
  • 1/2 cup unsalted butter, melted
  • 1/4 cup milk
  • 1 large egg
  • 1 1/2 cups all-purpose flour
  • 1 1/2 teaspoon instant espresso powder
  • 1 1/2 teaspoon baking soda
  • 1 teaspoon salt, (yes 1 teaspoon)
  • 1/2 cup semi-sweet chocolate chips, optional
  • 1/2 cup walnuts, roughly copped, optional
Preheat oven to 350*F. Butter and flour one loaf tin and set aside.

In a large bowl, mix together the bananas, sugars, butter, milk, and egg. In another bowl, combine the flour, espresso powder, baking soda and salt. Pour the wet ingredients into the dry ingredients and stir to combine. At this time you can add the chocolate chips an the walnuts. Of course this is optional but I added the chocolate, because why not...everything is better with chocolate.

Pour into prepared loaf pan and bake for about 55 minutes, or until the top is golden and a toothpick inserted in the middle comes out clean. Let cool in the pan for 15 minutes after taking out of the oven then invert into a wire rack to cool completely.

Tuesday, May 21, 2013

The best granola

Recently I got Gwyneth Paltrow's new cookbook, Its All Good. Lets just get one thing straight, I have a secret girl crush on Gwyneth. She seems so sweet and nice, and lets not forget absolutely gorgeous! So I got her new cookbook and its all about being healthy and living right. People need to realize that they only have one body and what you put into it effects your everyday life. I try to be health conscious as possible. I have read several books on food and benefits of certain types of food. I like the feeling of giving my body the best quality food I can find/cook. It makes be feel better about my self and actually makes my body happy. Ever since I have been more health conscious I have never felt better. I have more energy and my skin looks better. Everything about eating healthy is appealing to me. WARNING: There is no negative to eating healthy. Well I haven't ran into any negatives in the past couple years.
So back to the awesome cookbook. If you haven't read her book or anything about her, go online and read about her heath journey and how she lives. It is very interesting and it made me want to be even more health concerned. She lives her life with her body in mind and that is my goal for the rest of my life.
I haven't had much time to cook recently, I have been so busy with school ending and tests. Jut to let you know senior year of High school isn't as "relaxed" as people had told me. So everyone who told me I was going to have a stress free year, I want to throw a wet sock at your face, (Sorry for being so violent, but picture throwing a wet sock at your biggest enemy... its really funny, try it)
When I first got the cookbook, of course, I threw myself into it. I read it cover to cover at least three times by now. The first thing I wanted to make out of it was her famous granola. I don't know about you but I love granola. It's great on everything! Ice cream, with your favorite milk, yogurt, or just by its self for a quick snack. So just a quick warning that this recipes is really easy and the granola is very addicting. Since it's easy to make, you will be making this ALL the time. I made two big batches within on week because my family and I love it so much! And you don't have to worry about any weird ingredients or chemicals because you make it yourself! It's a win win!

The Best Granola
Adapted from It's All Good
(This recipe calls for Quinoa flakes but I used oats, so if you decide to use oats make sure they are old fashion, not the quick oats)
  • 1/2 cup extra virgin olive oil
  • 1/2 cup good-quality maple syrup
  • 1/2 tablespoon pure vanilla extract  
  • 3 cups quinoa flakes or oats
  • course sea salt
  • 1 1/4 cup walnuts
  • 1 1/4 cup raw pumpkin seeds
  • 3/4 cup roughly copped figs
  • 3/4 cup roughly copped pitted dates
Preheat the oven to 400*F
Whisk together olive oil and maple syrup in a large bowl. Add the oats or quinoa flakes, stirring to combine it all together. Evenly spread the mixture on a cookie sheet lined with parchment paper and sprinkle with sea salt. Make to keep your eye on the granola because it takes a while for it to get brown, but it doesn't take long for the granola to burn. I normally add the nuts to the mixture before I put it in the oven so the nuts are covered with the yummy coating. It doesn't really matter but that is what I prefer. Roast the granola or about 25 minutes. Stirring occasionally.
Let the granola cool completely when it comes out of the oven, then add the rest of the figs and daes. the add ins are totally optional, it is really good with the add ins, but just as good without them.
After you are done mixing the rest together, keep in an air tight container up to 3 weeks.
Hope you enjoy.  
SORRY FOR THE NO PICTURES! I SWORE I TOOK SOME BUT I GUESSED I DREAMT THAT!

Friday, November 2, 2012

Healthy Banana Muffins

At my house there has been A LOT of early mornings, the ACT, school, and of course deer season. Deer season around my house is a big deal. Not necessarily to me and my mom, but it is a valuable time for my dad and brother. They get up early and go out on the stand and just sit and sit for hours! I seriously don't know how they do it. My mom and I love deer season because we get two big benefits from the season: 1st, we get to enjoy the awesome deer meat they  bring home and 2nd, we get girl time! Its precious time that me and my mom NEVER take advantage of.
So when we have early mornings around here, it means breakfast is a hard choice. My dad and my brother like to stop by the nearest McDonald's and get themselves something, but I thought I would make their lives easier and keep them healthy as well. I found this recipe a while back and had wanted to make them for quite some time, but you have to have overly ripe bananas for the recipe. In my house we love bananas so they weren't getting soft before someone ate them! Finally I bought some bananas and told everyone in my family that they were not to be eaten or thrown away.
The muffins are healthy, easy , and really good! So whats not to like?!

Healthy Banana Muffins
yields about 12 muffins
80 calories EACH!
(I doubled the recipe because I wanted to freeze some!)

3/4 cup all purpose flour
1/4 cup whole wheat flour
1 Tbs baking powder
1/2 tsp baking soda
1/8 tsp salt
1 cup mashed banana (approx. 2 very ripe bananas)
1/4 cup sugar
1/4 cup plain applesauce
1 egg
1/2 tsp vanilla extract

Preheat oven to 350. Stir together the flours, baking powder, baking soda, and salt. Set aside. In a separate bowl beat bananas, sugar, egg, and vanilla. Stir in applesauce, stir in flour mixture. Pour batter into lined muffin tins. About 3/4 full. Bake for 15-20 minutes or until a toothpick comes out clean.

Tuesday, August 14, 2012

Dear Julia

So yesterday would have been Julia Child's 100th birthday, so I was feeling in the spirit to celebrate this special occasion.
I know ever since the blog and movie Julie and Julia people have been trying to cook their way through her cookbook and write about it, I would not be one of those people. I thought I could do it at one point, but after yesterday I know it could never ever happen. The reason why I could never ever do that is because all her food is sooooo good! I mean that's not a bad thing, but if you are like me and like to shove their faces with food and don't like to stop, I am warning you now. BACK AWAY FROM THE COOKBOOK. Okay now I can say I have warned you.
My mom and I thought it would be good to make a dessert because of course, why not?! I looked up her cookbook and the dessert that sounded AMAZING was the Reine de Saba avec Glaçage au Chocolat (chocolate almond cake with chocolate icing) Okay, so you are thinking to yourself chocolate cake with almonds, sounds SUPER exciting (sarcasm) BUT the thing is, it truly is amazing. I quote my dad on this "This is the best thing I have ever eaten" Well Dad you can thank Julia for this recipe.
Last night while I was eating this wonderful creation I was thinking if I were able to write a letter to Julia, what would it say? Would I thank her for this wonderful and addicting dessert, thank her for her great cooking ability or that she brought a great happiness to the kitchens all around the world? It gets the thinking...
AND I was watching the movie as I was shoving the cake in the mouth, I saw the part in the movie where Julie (the blogger) made the cake and it showed her and her husband shoving the cake in their mouths too. This make me feel a lot better because it's impossible to eat this cake without shoving it into your mouth. Don't be ashamed we allll do it.


Reine de Saba avec Glaçage au Chocolat
INGREDIENTS:
FOR THE CAKE
4 ounces or squares semisweet chocolate with 2 TBS rum or coffee
1 stick butter,softened
2/3 cup granulated sugar
3 egg yolks
3 egg whites
pinch of salt
1 TBS granulated sugar
2/3 cup pulverized almonds
1/4 tsp almond extract
1/2 cup cake flour, sifted

FOR THE ICING
2 ounces semisweet baking chocolate
2 TBS rum or coffee
5 to 6 TBS butter

INSTRUCTIONS:
FOR THE CAKE
Butter and flour a 8 inch cake pan and set aside. Preheat the oven to 350. Set the chocolate and rum or coffee in a small bowl over a pot of simmering water, let the chocolate melt while you start the ingredients. Cream the butter and sugar until pale yellow and fluffy. Beat in the egg yolks until well blended.
Beat the egg whites and salt in a separate bowl until soft peaks are formed, then add the sugar and beat until stiff peaks are formed.
With a rubber spatula, bland the melted chocolate into the butter, sugar and egg yolk mixture. Then stir in the almonds and almond extract. Immediately stir in one forth of the egg white mixture, fold it in DO NOT STIR VERY HARD! Blend nicely!!! Then add a little of the flour and fold that in as well. Repeat folding in the egg whites and the flour until it is all incorporated.
Turn the batter into the buttered and floured cake pan. Bake for 25 minutes or until a toothpick comes out clean on the edges and the middle is slightly under done. When it is done keep the cake in the pan for a good 10 minutes the take it out to cool.

FOR THE ICING
Place the chocolate and the rum or coffee into the bowl that is over a simmering pot of water and let the chocolate melt. When the chocolate has melted all the way and it is smooth, take the bowl out of the water and beat in the butter a TBS at a time. When you are beating in the butter place the bowl over ice so the chocolate cools off and thickens as you beat the icing. When the icing has the right consistency frost the cake. Make sure the cake has been cooled off for at least 2 hours before you ice the cake.


Enjoy and if you're like me, enjoy with coffee or a nice cup of milk.

Thursday, June 7, 2012

PASTA!

It has been to long since I have last blogged. I have been a little stressed lately and couldn't find the time to put up a post. The first day of summer I got into a wreck and I found out yesterday that my car that I LOVE was totalled. So today I had to go get all my stuff out of it and I cried. My mom and I pulled up to it and my car just looked so sad. I have been depressed all day and I also have been looking online for cars with my parents all day as well. You would think it would be fun, its not.


On to the PASTA! I have a passion to really learn how to make food. I want to travel and learn from native Italian, French, and Indian people. I want to go to the "roots" of where the food started and learn how to really make it. Of course that it my dream, so I had to stick to the books on this one. I looked in all my moms recipe books and I researched how to make homemade pasta. I wanted to perfect the method. My mom has a fantastic pasta maker that she lets me use and I love it! I decided to make ravioli and also make a tomato sauce. The dough for the ravioli is really easy but rolling it out is when you have to be patient. With making pasta I founds out that the first thing you need is patients.

Ravioli Dough
Serving size: 4

1 3/4 cup all purpose flour
1/4 teaspoon salt
3 large egg yolks
6 tablespoons (or more) water
5 teaspoons olive oil

Mix flour and salt in a medium bowl; make shallow well in center. Add egg yolks, 6 tablespoons water, and oil to well. Using fork, whisk water, egg yolks, and oil. Gradually work in flour from around egg mixture to form crumbly mixture. Knead in bowl until dough comes together, adding more water by 1/2 teaspoons if dry. Turn dough out onto lightly floured work surface and knead until smooth and elastic, about 5 minutes. Divide into 4 equal portions. Cover with plastic wrap; let rest on work surface for 30 minutes.
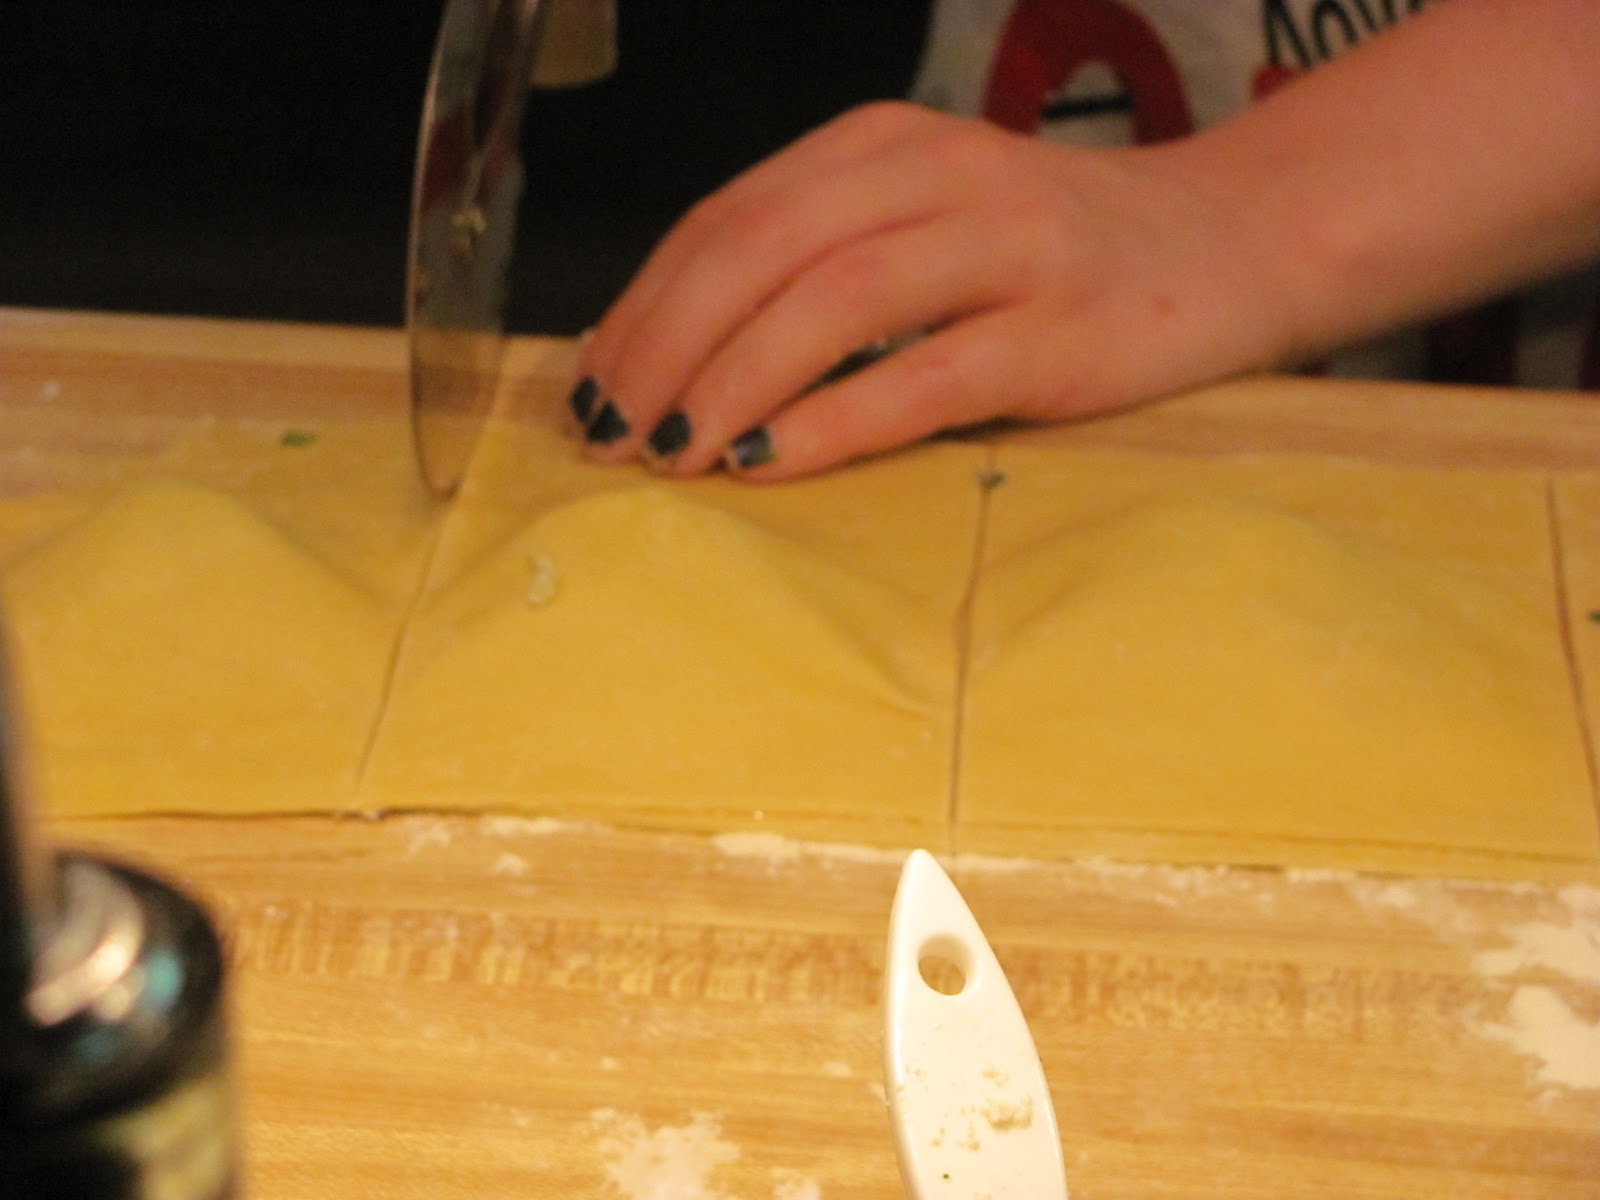
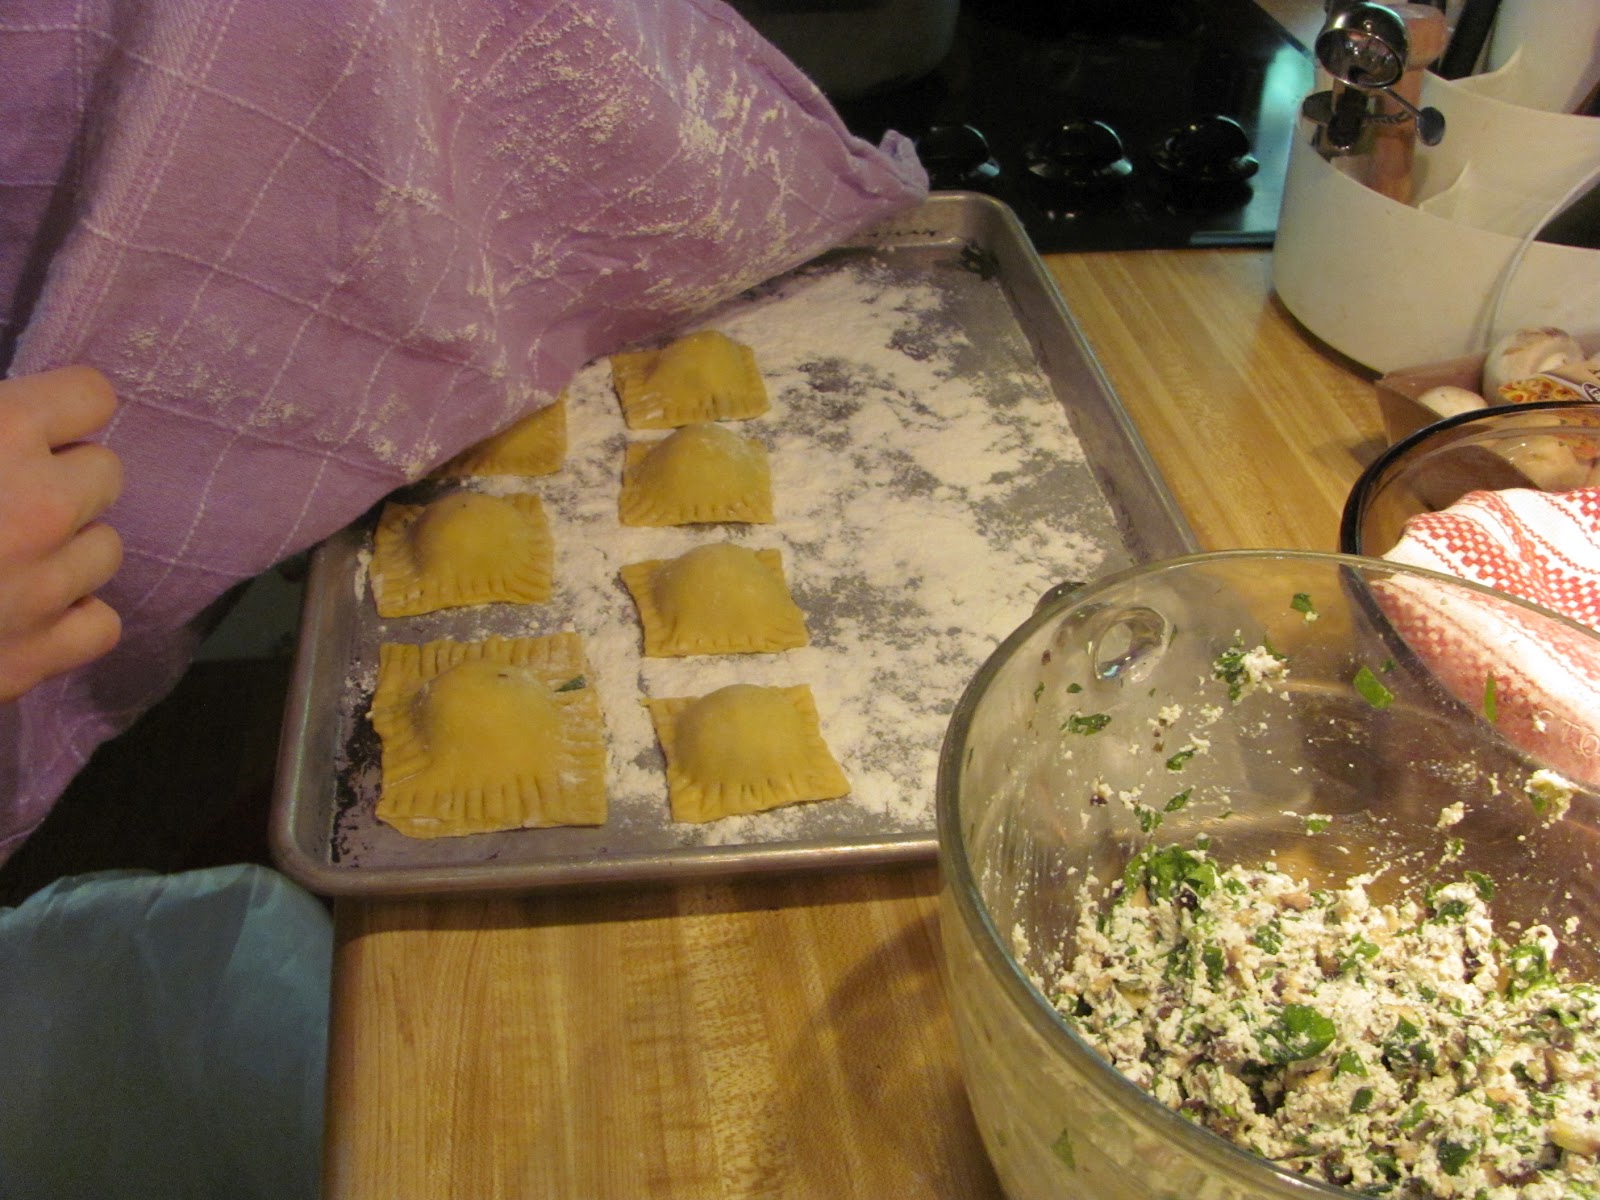
When the dough has rested take 1/4 of the dough and run it through the pasts machine on the biggest setting. Do that a couple of times and keep moving up the setting of the pasta machine so it get really thin. You want very tin dough. Once it is rolled out enough place about a tablespoon of your filling, use egg wash around the filling as a glue for the cover pasta and cover with another sheet of pasta. Cut the pasta (I used a pizza cutter, its just easy) and then press firmly with a floured fork so no water with get in. Set aside until the BIG pot of salted water is boiling. Homemade pasta cooks faster so once they have been floating on the top of the water for about 2 minutes, they are done! Serve with your favorite sauce! It sounds difficult, but give it a shot! You will want to keep making pasta, trust me!
My filling for the ravioli was ricotta cheese, mushrooms, and spinach. I found a recipe for homemade tomato sauce and I also added meat into sauce since the filling didn't have any. You can really put anything with this pasta. It has a great texture and when it is cooked, it has great flavor.

Sunday, April 8, 2012

For the Love of Bread

I don't know about you but I have a love for bread. The smell of bread baking in the oven makes my day. The joy of taking it out of the oven and slicing it and watching the steam come out of the hot, irresistibly yummy bread. I don't care if it is banana bread or fresh baguettes....I love bread. Sweet or savory.
So I thought I would share a savory bread recipe that I created a couple weekends ago when I had no homework and it was raining outside. When it is raining I either want to be at Barnes and Noble or I want to be cooking/baking something. Even though I could be cleaning my room or working out....I chose to bake some bread. Now looking back on it, I should have worked out, then should have  baked some yummy not so good for you bread. OH well. It has oats in it and dried friut...just say its healthy and don't think anymore about it.

Here are your ingredients:


2 1/2 cups all-purpose flour
1 tsp. baking powder
1 tsp. baking soda
1/2 tsp. salt
1/2 tsp. ground cinnamon
Dash of nutmeg
1 cup quick cooking oats
3/4 cup honey
1/3 cup vegetable oil
2 eggs
1/2 cup fat-free milk
2 cups fresh cranberries (or 1 cup dried)

Preheat oven to 350 degrees F and grease a 9x5 inch loaf pan. In a medium bowl, stir together flour, baking powder, baking soda, salt, cinnamon, nutmeg and oats.

In a large bowl, mix together honey, vegetable oil, eggs and milk. Mix in flour mixture until just moistened. Stir in cranberries and pour into prepared baking dish. Bake for about 40 minutes, or until a toothpick inserted in the center comes out clean. Enjoy!

Saturday, February 25, 2012

It's Easy Being Green

Lately in Oklahoma, the weather was been awesome. It was 72 degrees the other day and today it's a mild 62 and I'm loving it. This weather makes me wish the Farmer's market was open. Since the weather has been so nice, my family and I have been grilling things outside on the grill. Every time my dad grills something, it makes me think of SUMMER! I cannot wait! Even though this school year has been great and all, I'm ready for a nice long break!
I love the green color
OK so back to the food, lately I have discovered brussel sprouts. They are so cute and little, but they can be intimidating. If you don't cook them the right way, you will end up eating a very bitter little brussel sprout. I found a recipe that sounded great and I thought to myself, I have to start somewhere and improve from there. I ended up making them with grilled chicken. These little guys were AMAZING! They had just the right sweetness to them and I should have made more!

Roasted Brussel Sprouts
A Molly Woodward Creation

  • 1 1/2 -2 lbs. of brussel sprouts, trimmed and cleaned
  • sea salt and pepper, good amount
  • about 4-5 Tbs. of olive oil
Preheat your oven to 400.
Cut off the ends and yellow-ish leaves.
Make sure your brussel sprouts are trimmed and washed. Take a cookie sheet or a glass container and lay all the little brussel sprouts out on it. Drizzle with olive oil and season well with salt and pepper. Make sure all the brussel sprouts are coated with everything. Pop in the oven for about 30-40 minutes. Check on them and when they start to turn dark, pull them out and gobble them up.
They should look like this when they are done!


This recipe is SUPER easy and really yummy. The good thing about this recipe is that you can serve it in a salad, pasta, or just as a side dish. It is excellent and worth the try. Don't be scared, they are Delicious!

Tuesday, January 31, 2012

A Little Adventure

A couple weeks ago my mom and I went to the Asian market! Sounds exciting doesn't it?! Well it is! We were on a mission, a mission for RICE PAPER!!! My mom and I have looked EVERYWHERE in Edmond for rice paper and we hadn't found any! I wanted to recreate these spring rolls Target sells in the deli section. I discovered them a couple months ago and I crave them all the time now! I found a recipe and all I needed was the rice paper, so we were at our braking point until my dad suggested the Asian market! I got so excited and a couple of hours later my mom and I found ourselves in the middle of the biggest, who knew it was there, Asian market. The market was HUGE and I couldn't believe this magical place was here this whole time. I felt like a kid in a candy store. My mom and I were lost, so we asked this really nice old Asian man, whos barely spoke any English, to help us find the rice paper. He quietly walked over one aisle and pointed down this whole aisle with rice paper and rice noodles. I almost peed my pants I was so excited!

Classic Spring Rolls
yields 8 spring rolls

20 large cooked shrimp, cut in half
1 package of lettuce
Thia basil
cilantro
rice noodles
lime juice
8 rice paper sheets

Dip the sheets in the water one at a time. First put down the cut in half shrimp(about 4 per roll), then the lettuce, Thia basil, cilantro cooked rice noodles, and lime juice. Roll the little sides in, then the bigger sides. They will stick and so you need to do it right the first time. Repeat these steps until you are out of sheets.


Dip you spring rolls into sweet chili sauce (at target in the Asian aisle) or soy sauce.
These are SUPER easy and very yummy of course!

Saturday, January 21, 2012

New Look to the Normal

My family and I love to try new foods and experiment with new flavors. One of our favorite go to appetizers or snack is Boudin. If you have never heard of boudin, I want you to drive right now to Walmart and get some. You can also order it off websites, the ones online from Louisiana are better, but not everyone is patient enough to wait that long. Boudin is a highly seasoned  link sausage of pork and rice that is a typical element of Louisiana Creole cuisine. It comes in a casing that you eat it out of. You can grill them, poach them, or in this case FRY THEM! We normally poach them with some water in a skillet and turn the burner on medium-high heat and wait til it is heated all the way through. If you do it this way, you might need to keep an eye on it and had more water.
My family and I were watching a cooking show and they were talking about boudin and they said the ways to cook it and one of the ways was to fry it! My dad insisted we try it, so we did and I feel like my life has changed forever. In Oklahoma frying almost anything is normal, which might be the reason that we are up there on the obesity chart! So my advice is to not eat this everyday! haha but once you try it, you will want it every day.

Fried Boudin
thanks to my dad for preparing it :)


Boudin unprepared.


Take your boudin and cut it about an inch in diameter or each piece. As seen in the picture to the left.
 Prepare your egg wash with about 4 eggs whisked together in a bowl and then some plain bread crumbs in another bowl. No need to add any salt or pepper because the boudin is already seasoned to perfection. 

Ready to fry!


Get your cast iron skillet hot with oil. Dip your boudin in egg wash then the bread crumbs and stick in the skillet. Cook for about 3-4 minutes, take out of the skillet, let cool and ENJOY! I like to put a little bit of hot sauce on top of mine before I eat them!

Done!

Heaven!


Appetizer Idea:
Once you get the boudin out of the skillet put a toothpick in the top and put of a platter and serve to your hungry guests. They will thank you forever for this discovery!

Monday, January 16, 2012

NEW YORK, NEW YORK

My dream is to go to New York and eat New York food. When I say "New York food" I mean bagels, street food, and all the other food New York has to offer. My Dream is going to come true next November! I get to go to New York with my school and I'm super pumped! I have been looking forward to this since my freshman year!
Since I still have a while before I get to go, I decided to experiment and make NEW YORK BAGELS! If you don't know, New York bagels aren't like your everyday (panera) bagel. They aren't as though on the outside, the are more "tinder" and yummy! Once you have had a New York bagel, you will never go back.
I went searching and searching for recipes on bagels and I finally found one that I felt like I could accomplish! Keeping in mind that I never have made bagels in my life, so this was an experience!

NEW YORK STYLE BAGELS!!!
sophisticatedgourmet.com- check it out!

4004598663 d7a657d5f1 new york style bagel recipe
Pic credit- sophisticatedgourmet.com
 2 teaspoons of active dry yeast
1 1/2 tablespoons of granulated sugar
1 1/4 cups of warm water(you may need 1/4 cup more, I did!)
3 1/2 cups of bread flour or high gluten flour(will need extra for kneading)
1 1/2 teaspoons of salt

PREPARATION:
1.  In 1/2 cup of the warm water, pour in the sugar and yeast. Don not stir. Let it sit for five minutes, and then stir the yeast and sugar mixture, until it all dissolves in the water.

2. Mix the flour and salt in a large bowl. Make a well in the middle and pour in the yeast and sugar mixture.

3. Pour half of the remaining warm water into the well. Mix and stir in the rest of the water as needed. Depending on where you live, you may need to add anywhere from a couple of tablespoons to about 1/4 cup of water. You want to result in a moist and firm dough after you have mixed it.

4.On a floured counter top, knead the dough for about 10 minutes until it is smooth and elastic. Try working in as much flour as possible to firm and stiff dough.

5. Lightly brush large bowl with oil and turn the dough to coat. Cover the bowl with a damp dish towel. Let rise in a warm place for 1 hour, until the dough has doubled in size. Punch the dough down, and let rise for another 10 minutes.
4005918294 1ef96ce2d1 new york style bagel recipe
6. Carefully divide the dough into 8 pieces. Shape each piece into a round. Now, take a dough ball, and press it gently against the counter top moving your hand and the ball in a circular motion pulling the dough into itself while reducing the pressure on the top of the dough slightly until a perfect dough ball forms. Repeat 7 other dough rounds.

7. Coat a finger in flour, and gently press your finger into the center of each dough ball to form a ring. Stretch the ring to about  1/3 the diameter of the bagel and place on a lightly oiled cookie sheet, repeat with the remaining dough.
4004595939 baab4dc795 new york style bagel recipe
8. Bring a big pot of water to a boil and drop the bagels in, they should float to the top. Boil them for 4 minutes on each side. Take them out and put them on a baking sheet. This is where you would add whatever toppings you want. Let them bake 350degrees in the oven for about 20-30 minutes or until golden brown and cooked all the way through.

OK so I know what your thinking, there are too many steps and I can't do it. YOU CAN! It isn't hard, there are just a lot of steps to follow! BUT......IT IS WORTH IT!!! SOO my pictures go deleted off my camera so I took some off this blog I follow!

Friday, January 6, 2012

Like a Good Neighbor

I hope everybody had an excellent Christmas/New Years! Mine was fantastic and I'm back in school and hating it!
When New Years comes by many people as you know make New Years resolutions. I made one for myself and it is to get through P90X. I finally got the courage to order it this week, so it is on its way as we speak(or blog chat). I'm nervous to see whats its like. I don't mean to sound narcissistic but I work out and I would say I'm fit, but may people say its harder than it seems.....
So enough with the healthy plans....on to the real stuff, FOOD!
Over the break I get really bored toward the end because THERE IS NOTHING TO DO! So when I'm bored I do what everyone does...bake something! I wanted to make something yummmy, but I didn't want to eat it so I decided to take it to our neighbor! I decided to make a peanut butter pie! My neighbor informed me that this pie is AMAZING and I trust her because it smelled like heaven and I took a lot of will power for me not to stick a fork into it and just start eating it!
The Giving Pie
peanut butter pie

1 9in. pie crust
1 cup sugar
3/4 cup all-purpose flour
3 TBS peanut butter (creamy or chunky)
1/2 cup unsalted butter, melted
2 large eggs, beaten
1 tsp vanilla extract
1 cup peanut butter M&M's
2/3 cup milk chocolate chips

Preheat oven to 350*

Place prepared pie crust in a 9in. greased pie pan and set aside.
In a medium mixing bowl combine sugar, flour, peanut butter, and butter. Mix well.
Add eggs, vanilla. Mix until combined. BY HAND stir in the peanut butter M&M's and chocolate chips. After you have mixed the two final ingredients, pour the batter into the prepared pie crust.
Bake for about 45 min. or until the middle is firm. DO NOT over bake it! The pie will look a little darker on top, but DO NOT let it go in the oven for too long! Let it set for at least an hour.
Serve with some ice cream or put in a basket and deliver it to your neighbor!

It looks like a cookie on the top,yum


Try a random act of kindness, make this pie and deliver it to someone you think needs it. You wont believe how good it feels to do something good for someone else!

Friday, December 23, 2011

A Reason To Celebrate

       Okay, I don't know about you but I feel like this year has flown by so fast. I'm already half way into my harder than hard junior year and I'm freaking out a little bit. My teachers, parents, and any other person who asks what grade I am in keeps reminding me what I need to do before next year......ACT score, college, grades, A PLAN of some sort, the list goes on and on. The one thing that gets my mind off of all those things is... you guessed it FOOD!
   My Brother Keith's birthday was the 18th and mine was the 20th and since they are so close to Christmas, Keith and I never give each other birthday gifts. This year we decided to make/buy our gifts. Keith LOVES yellow cake, so I decided to bake him a birthday cake from scratch. Keith bought me a cake that I love and dream about all the time, I was very happy!

Yellow Birthday Cake
yum yum
Yield: Two 9-inch round, 2-inch tall cake layers, and, in theory,

4 cups plus 2 tablespoons (480 grams) cake flour (not self-rising)
2 teaspoons (10 grams) baking powder
1 1/2 teaspoons baking soda
1 teaspoon (5 grams) table salt
2 sticks (1 cup, 1/2 pound or 225 grams) unsalted butter, softened
2 cups (400 grams) sugar
2 teaspoons (10 ml) pure vanilla extract
4 large eggs, at room temperature
2 cups buttermilk (475 ml), well-shaken
Preheat oven to 350°F. Butter two 9-inch round cake pans and line with circles of parchment paper, then butter parchment.

Sift together flour, baking powder, baking soda, and salt in a medium bowl. In a large mixing bowl, beat butter and sugar in a large bowl with an electric mixer at medium speed until pale and fluffy, then beat in vanilla. Add eggs 1 at a time, beating well and scraping down the bowl after each addition. At low speed, beat in buttermilk until just combined (mixture will look curdled). Add flour mixture in three batches, mixing until each addition is just Incorporated.
Spread batter evenly in cake pan, then rap pan on counter several times to eliminate air bubbles. (I like to drop mine a few times from two inches up, making a great big noisy fuss.) Bake until golden and a wooden pick inserted in center of cake comes out clean, 35 to 40 minutes. Cool in pan on a rack 10 minutes, then run a knife around edge of pan. Invert onto rack and discard parchment, then cool completely, about 1 hour.
Chocolate Sour Cream Frosting
Yes, it’s true: A chocolate frosting recipe without any butter, whipped eggs and barely a modicum of added sugar. Oh, and you don’t even need an electric mixer to make it. What are you waiting for?
Only cooking note: Be sure that your sour cream is at room temperature before you make the frosting. Makes 5 cups of frosting, or enough to frost and fill a two layer 9-inch cake

15 ounces semisweet or bittersweet chocolate, chopped
1 1/4 teaspoons instant espresso (optional, but can be used to pick up the flavor of average chocolate)
2 1/4 cups sour cream, at room temperature
1/4 to 1/2 cup light corn syrup
3/4 teaspoon vanilla extract
Combine the chocolate and espresso powder, if using, in the top of a double-boiler or in a heatproof bowl over simmering water. Stir until the chocolate is melted. (Alternately, you can melt the chocolate in a microwave for 30 seconds, stirring well, and then heating in 15 second increments, stirring between each, until the chocolate is melted.) Remove from heat and let chocolate cool until tepid.
Whisk together the sour cream, 1/4 cup of the corn syrup and vanilla extract until combined. Add the tepid chocolate slowly and stir quickly until the mixture is uniform. Taste for sweetness, and if needed, add additional corn syrup in one tablespoon increments until desired level of sweetness is achieved.


Let cool in the refrigerator until the frosting is a spreadable consistency. This should not take more than 30 minutes. Should the frosting become too thick or stiff, just leave it out until it softens again.

Sunday, December 11, 2011

ACT Tacos

This morning, of all mornings was the fabulous and terrifying ACT. It was my first time taking it and I was really nervous. My plan was to go in blind and see what I get, then take the class and study. Well lets just say I will be taking it again for sure. I felt good during everything except for the science part. I mean really do I really need to be comparing graphs on rocks and erosion?!?! If you can't tell by my choice of punctuation, I had NO idea what was happening with that whole section of that test. So my Saturday started off not to the best start, but then it got worse because my mom and I decided to go to the mall. It didn't ocure to us that it is about 2 weeks until Christmas! 25 MINUTES TO FIND A PARKING SPOT! So I was having a bad day until my mom said I could make dinner! That always makes my day better. So I decided to make shrimp tacos! I found this recipe online and we just finished eating it. I feel like I just ate a whole....something that makes you feel sick. Anyway, this recipe is really yummy and a little on the spicy side, but you can always tame it down a little bit.

Chipotle Shrimp Tacos!!!

Ingredients:
  • 1 (12 ounce) package bacon, cut into small pieces
  • 1/2 onion, diced
  • 2 pounds large cooked shrimp- peeled deveined, and cut in half
  • 3 chipotle peppers in adobo sauce, minced
  • 12 corn tortillas
  • 1 cup chopped fresh cilantro
  • 1 lime, juiced
  • salt to taste
Directions:
  1. In a large, deep skillet fry the bacon over medium- high heat until evenly brown. Drain the bacon fat. Add the onions to the pan with the bacon and cook 5 minutes or until the onions are translucent. Stir the shrimp and chipotle chiles; cook 4 minutes or until heated through.
  2. Heat tortillas on an ungreased skillet over medium high heat for 10 to 15 seconds. Turn and heat the other side. Fill the heated tortillas with shrimp mixture. Sprinkle with cilantro, lime juice, and salt. You can also add avocado, cheese, sour cream! SUPER YUMMY!!!

Sunday, November 27, 2011

Turkey Hangover...

Happy late Thanksgiving everybody! I hope everyone got to see their loved ones over the break. I don't know about you, but I had WAY too much to eat. I literally felt ill after eating our amazing lunch. My Nana cooked and of course she packet us left overs to take and not only did I gain 5 lbs. just from eating that one day, I gained another 5 from eating two days after Thanksgiving. It will be awsome hitting the gym on Monday...

So last Sunday we had our weekly D.D.D. If you dont know what that is I'll clue you in. Every Sunday my family and my Dad's brother's family eat together and watch Dexter..(Dexter, Dinner, & Drinks..get it) Anyway, we switch off houses every week and last Sunday I was at my house. When D.D.D. is at your house, you make the Dinner and provide Drinks and watch Dexter on your T.V. Hopefully you caught on by now.

So back to my house.... I made bruchetta as an appetizer and I experimented and made a new bread. My mom also made fantastic pasta (I'll share with you later) and we had baked apple crisp for dessert from my Aunt Rene. I have made bruchetta a million times and so I thought I would finally share it.

Bruchetta
  • 6 to 7 plum tomatoes (about 1 1/2 lbs.)
  • 2 cloves garlic, minced
  • 1 Tbs. extra virgin olive oil
  • 1 tsp. balsamic vinegar
  • 6-8 fresh basil leaves, chopped
  • salt and freshly ground black pepper
  • 1 French baguette
  • 1/4 cup olive oil
Get a medium bowl and set a side. Chop the tomatoes, mince the garlic and add the EVOO into the bowl. Then, add balsamic vinegar, chopped basil, and salt and pepper. Put a lid on the bowl or put some covering over it and set in the fridge so the ingredients can mature together. Cut the French baguette into about 1/2 inch peices and set aside. Heat a skillet over medium to high heat. coat both sides of the bread with olive oil and put in the hot pan until each side is golden brown and the set a side. After you are done with the bread, you can top the bread with the tomato mixture and serve. This recipe is awsome and super easy.

Friday, November 4, 2011

Blueberries and Knitting

   A couple weeks ago, while I was on Fall Break, I learned how to knit. I was taught by a fantastic resident at a retirement community, Jonni  and she was a great teacher. She was taught by the Red Cross during WWII and she knitted vests and all kinds of things for the soldiers at war. I love hearing all of her stories and her many adventures she has had. The ladies at this retirement community knit every Friday at 1:30. I could go during Fall Break because I was off school and I could go today because I was off school for conferences. Anyway I have learned to knit and I love it! And to all those people who laughed at me for learning how to knit, looks like you don't get a Christmas present. You shouldn't have laughed....... I'm not bitter about people laughing at me or anything... 

   So I was going to Sit'n Knit today and I thought I would use my other fabulous, not laughable talent to bake something yummy for the ladies. I found this amazing blueberry lemon bread recipe. It sounded so yummy so like I always do, I made it. It ended up being a great hit and the ladies loved it. I know what your thinking, wow she can cook and knit, she must be super woman! No, almost though.....I'm getting there. Since I'm almost super woman I thought I would share the secret to my success....THE RECIPE!

Sit'n Knit Yummies
Also known as Lemon Blueberry Yogurt Loaf

For the loaf you will need:
  • 1 1/2 cups + 1 tablespoon all-purpose flour
  • 2 teaspoons baking powder
  • 1/2 teaspoon kosher salt
  • 1 cup plain Greek yogurt
  • 1 cup sugar
  • 3 large eggs
  • 2 teaspoons grated lemon zest (about 2 lemons worth)
  • 1/2 teaspoon pure vanilla extract
  • 1/2 cup vegetable oil
  • 1 1/2 cups blueberries, fresh or frozen, thawed and rinsed
For the lemon Syrup:
  • 1/3 cup freshly squeezed lemon juice
  • 1/3 cup sugar
For the lemon glaze:
  • 1 cup powdered sugar
  • 2 to 3 tablespoons fresh lemon juice
Directions:
  1. Preheat oven to 350 F. Grease bottom and sides of one 9 x 5-inch loaf pan.(I put parchment paper on the bottom of loaf pan because it tends to stick! Hate it when that happens, don't you?)
  2. Sift,sift,sift,sift,sift,sift.
  3. In a medium bowl, sift together flour, baking powder and salt. Set aside.
  4. In a large bowl, whisk together the yogurt, sugar, eggs, lemon zest, vanilla and oil. Slowly whisk together the dry ingredients into the wet ingredients. In a separate bowl, mix blueberries with remaining tablespoon of flour, and fold them very gently into the batter.
  5. FOLD the blueberries into the batter.
  6. Pour the batter into the greased loaf pan and bake for 50-55 minutes or until you insert a tooth pick and it comes out clean. Then take it out of the oven and let cool for at least 10 minutes before you take it out of the pan. While the bread is cooling make the syrup by mixing the lemon juice and sugar together and putting it on the stove until the sugar is dissolved.
  7. When the syrup is done, poke little holes in the top of the loaf with a tooth pick. Brush the syrup onto the loaf and all around the sides. Do that twice. You will have plenty of the syrup left over. Let the loaf cool completely.
  8. Loaf with the syrup!
  9. When the loaf has cooled completely, make the glaze. Mix the powdered sugar and lemon juice together until it is stiff but enough for it to be poured over the loaf. When poured, let it do it's thing for 15 minutes and you can serve it!
So I have shared with you a super woman recipe and I trust you to only share it with the people who can handle the greatness of this recipe.

The dog wags his tail, not for you, but for your bread.
Portuguese Proverb

Everyone is kneaded out of the same dough but not baked in the same oven.
Yiddish Proverb

Saturday, October 29, 2011

Family Matters

UPDATE! A lot has been going on in my world lately and I thought I would update you on what has happened!

This past weekend I met the most awesome man on the Food Network! I'm going to let you guess.............

I'll give you a hint...
Good Eats
Iron Chef

Any guesses? OK I'll just tell you, Alton Brown!!! Oh my goodness I was super excited to meet him! He came to Oklahoma for his 3rd cookbook signing tour. When my mom and I found out he was coming, we were so excited!!! If you are unfortunate and don't have good taste in food network shows and don't know who Alton Brown is, look him up! He is funny, smart, and his show is excellent! I kind of have a secret crush on him! His recipes are awesome and you need to try them!

OK, so the other thing I need to tell you about is that my Uncle Mark and his family came over to watch Dexter and we ate and had a good time. We ate an amazing dinner that almost everyone contributed to. My wonderful dad grilled steaks, my beautiful mother baked potatoes, my Uncle Mark created a wonderful salad, and my Aunt Rene made a home-made apple pie! By the end of the night I thought my stomach was going to burst because I was so full, but it was worth it!

My Uncle Mark's salad consisted of: grilled romaine lettuce, walnuts, feta cheese, purple grapes and a fantastic dressing. This salad was amazing and very artistic looking. My Aunt Rene's pie was a fabulous Paula Deen recipe and it was the best apple pie I had ever eaten. It was so yummy and what made it even better was that my favorite aunt made it from scratch and it had apple sauce in it! Sounds weird, but it made the pie even better.

I love my Uncle Mark, Aunt Rene, my cousins Megan, MariBeth, and Seth so much! They are awesome and I'm so blessed to have such great family and I can count on them for anything! Have a great Halloween! Be thankful for your family!

Thursday, October 20, 2011

Pepper Jelly on a Lazy Day

      This past weekend, my three best girlfriends and I went to a Taylor Swift concert! It was so fun and I wish I could have a Taylor Swift concert every night with my best friends! So the concert was on a Saturday night and I didn't get home and in bed until after midnight! I was exhausted! So I didn't go to church the next morning and I felt really guilty, but I know He still loves me even though I skipped church!ha
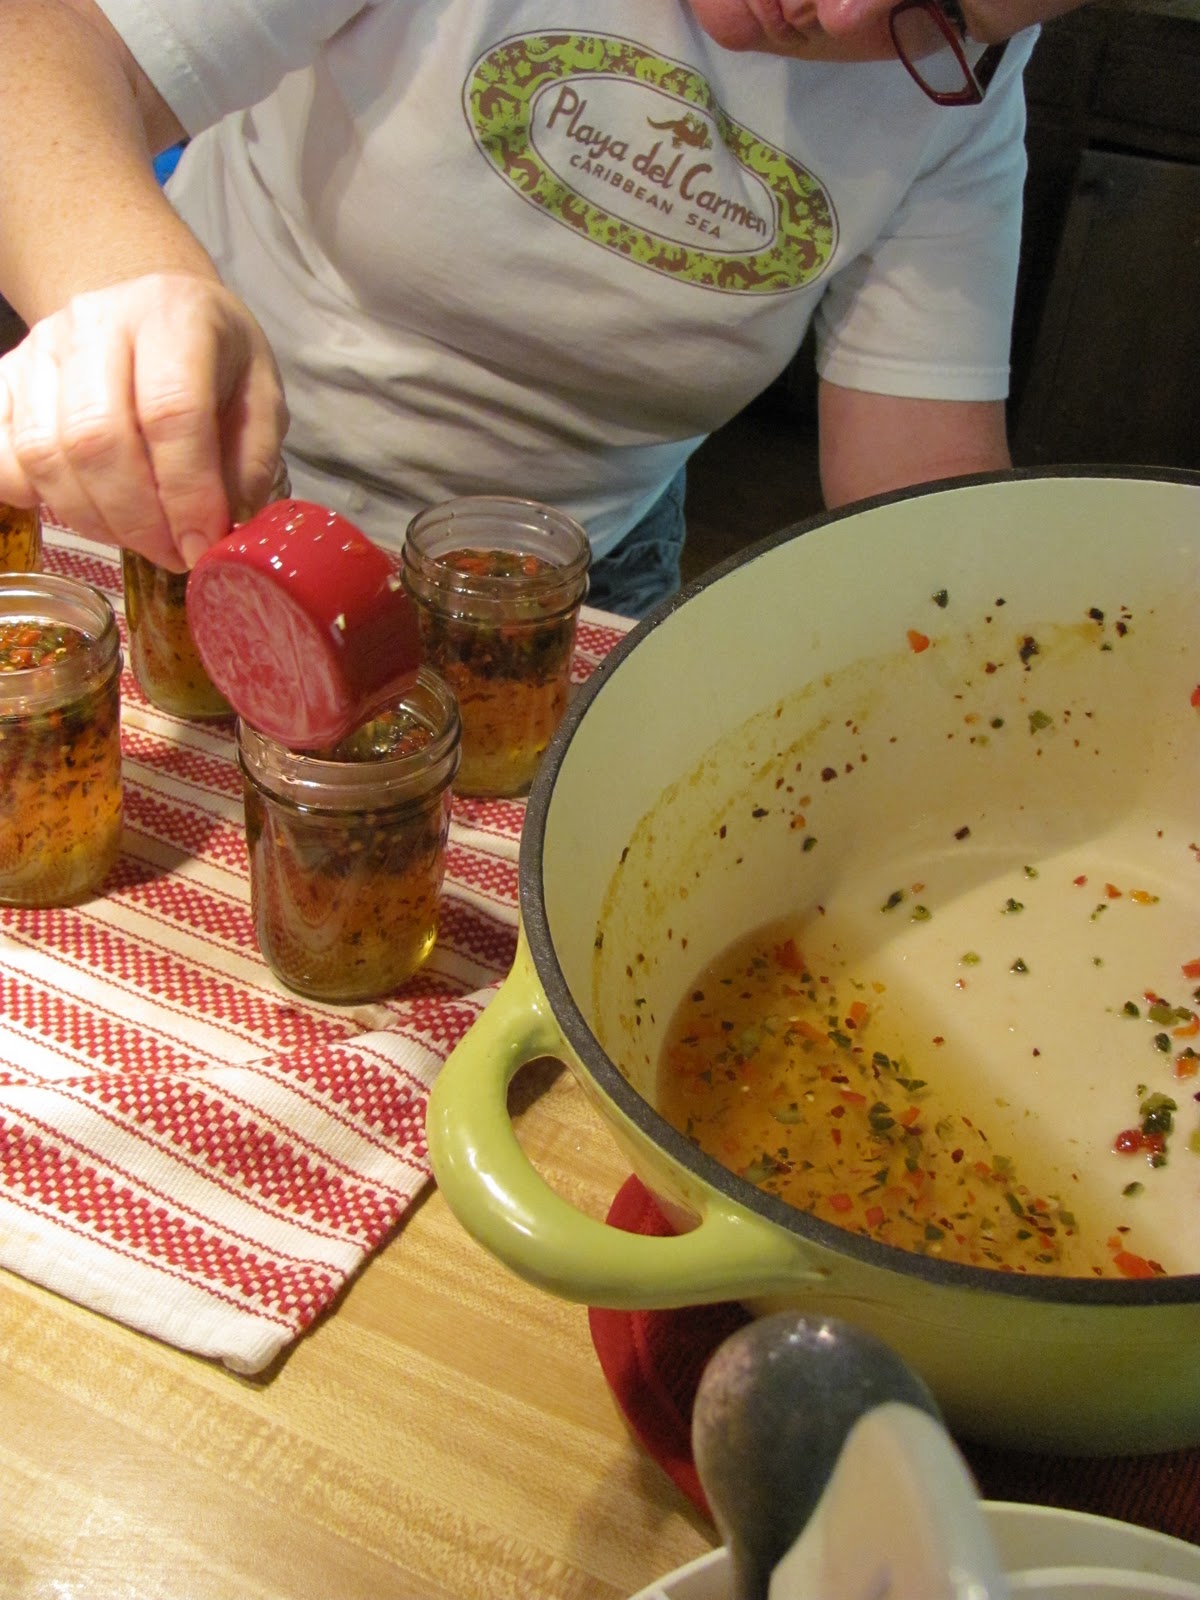
         So on my lazy Sunday my family and I made Pepper Jelly!!!! We have the best time making it and we are eating it like crazy!! So I took some pics for you guys to show how easy it is and how you can do it too!

         AMAZING Pepper Jelly
        recipe from Putting Up

Canning Notes:
  • This recipe can be doubled but not halved.
  • Makes 7 plus pints of jelly
  • This is a hot pack, sugar saturated recipe
Ingredients:
1 1/2 cups small dice green bell pepper (seeded)
1 1/2 cups small dice red bell pepper (seeded)
1 1/2 cups white vinegar (5% acidity)
6 1/2 cups sugar
1/2 tablespoon butter
2 tablespoon red pepper flakes
1 pack liquid pectin (Certo)

Bring all ingredients except pectin to a rolling boil in a pot. Add pectin return to a boil. Time for 1 1/2 minutes and begin checking for jelling.  Take pot of burner and start putting the ingredients equally into 6 pint jars. DO NOT GET THE JELLY ON THE SIDE OF THE JAR OR ON THE RIM. After you have distributed the jelly equally into the jars, put the lid on tight and turn over for 2 minutes and then turn back over for 2 minutes and keep repeating until it is firm enough for you!!!


Enjoy your jelly on crackers with cream cheese! Happy Canning!!!